Backup
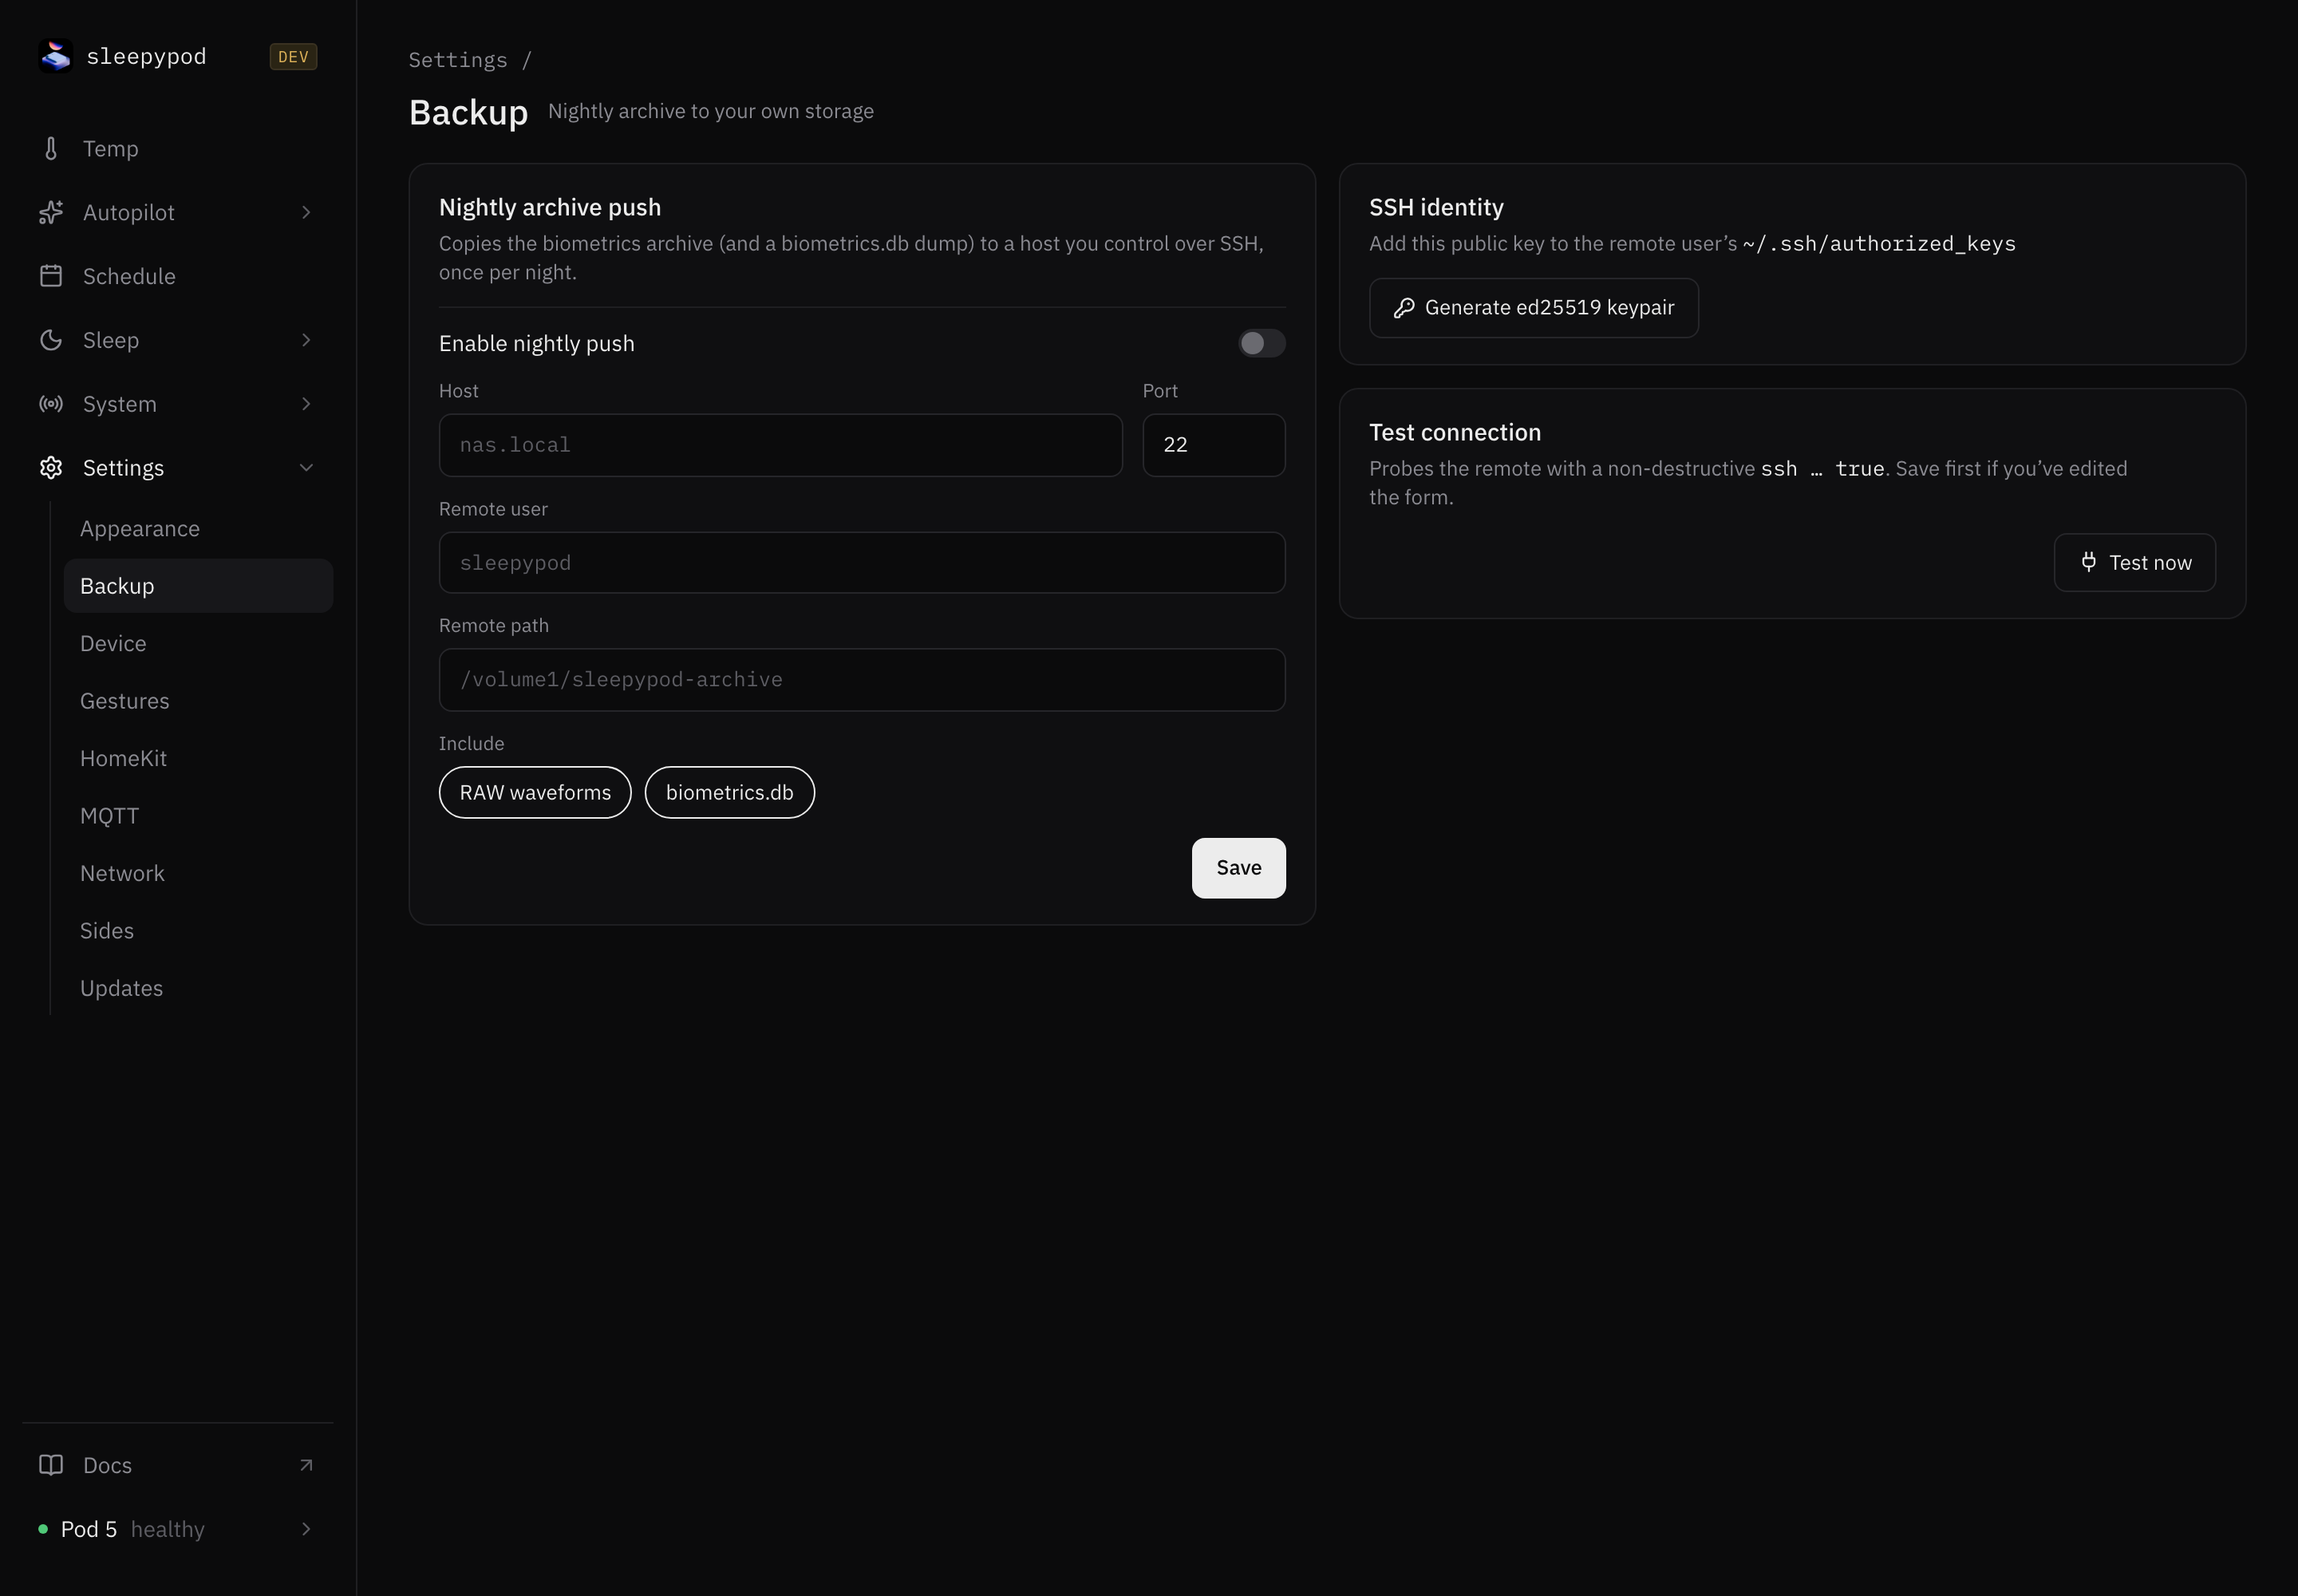
Settings → Backup copies your sleep data off the Pod once a night, over SSH, to a computer you control. A network storage device (NAS) is a common choice.
This backup covers sensor archives and sleep data. It does not include your settings, schedules, or automations. To save everything, download a full backup from System → Databases.
Set up the nightly copy
- Under SSH identity, select Generate ed25519 keypair. The Pod creates a key and shows its public half.
- Select Copy key. On the destination computer, add it to the remote user’s
~/.ssh/authorized_keysfile. - Under Nightly archive push, fill in the destination:
- Host, for example
nas.local. - Port, usually
22. - Remote user, the account you added the key to.
- Remote path, the folder to copy into, for example
/volume1/sleepypod-archive.
- Host, for example
- Under Include, choose what to copy. Both are on by default:
- RAW waveforms: the raw sensor archive files.
- biometrics.db: a copy of the sleep and vitals database.
- Turn on Enable nightly push and select Save.
- Under Test connection, select Test now. You should see Reachable. Test again after any change, and save before you test.
The test only checks that the Pod can log in; it does not copy or change anything. On firmware that streams sensor data instead of writing RAW files, the RAW archive can be empty. That is expected. See System → Health to see which kind your Pod uses.
If the test fails
- Check that the key is in the right user’s
authorized_keysand that the file permissions allow SSH to read it. - Check that the Pod can reach the host. The Pod’s Network setting only blocks the internet; local addresses still work.
- Check the remote path exists and the user can write to it.
Source reference: Backup form · Archive push API
Last updated on